
Sitecore Personalization: How to Preview your page before go live
You’ve strategized and setup personalization in Sitecore. Now what? Before going live with any new change, especially something as drastic as personalization, it’s essential that you’re able to preview the change, demo it, and even send screenshots around.
Without further ado, here are some tips to take you from Personalization setup to go live:
There are essentially 4 ways to preview personalization:
1) Preview via Experience Editor
On the component where you’ve setup personalization, you should see an icon that showcases the version of personalization you are viewing along with the number of personalized versions available for the component, and looks like this:

Personalization variants editor
You can switch between the different personalized versions of the component by either clicking the up and down arrows
OR by selecting the appropriate version of the component from the dropdown
When to use:
Always look at your component in Experience Editor after applying personalization. It’s a quick, easy way to test each personalized version of the component, how it works with the rest of the page, and ensure that you have all the fields filled out, have the appropriate CTAs, text, images and resolutions.
When not to use:
This preview doesn’t check that your personalization rules are working, only that each of your personalized versions of the component are setup correctly.
2) Preview via Experience Explorer
Once in Experience Editor, in the Toolbar, “Mode” section, Click Explore.

Explore mode
Your site should open up in “Explore” view. If it doesn’t, there is a bug in some versions of Sitecore, where the word “normal” in the querystring, needs to be changed to “explore”.

Changing the sc_mode query string parameter
Your “Settings” and “View” panes maybe minimized. Click on the arrows to maximize them.

Experience Explorer - Maximize with arrows
Now you can trigger campaigns, setup your geolocation, etc in the settings, and witness your personalization rule getting triggered in the view pane, via a checkbox.
Also, you should be able to see your page with the appropriate personalization rule(s) triggered.

Experience Explorer: Triggering Foodie campaign
Issue with Geolocation-based personalization rules:
If your Geolocation based personalization rules are not getting triggered, it is possibly an issue with Geolocation not being turned on. In order to turn on, geolocation in Sitecore, try the following: Set up Sitecore IP Geolocation
Presets and Previewing Pattern Card based Personalization:
Previewing Personalization based on Pattern Card or Profiling rules are a little difficult, as compared to rules based on campaigns, geolocation, etc. In this case, setting up presets work well.
To setup Presets, go to the Marketing Control Panel, Experience Explorer, Presets. You can click on an existing Preset and Modify it or create your own Preset. Within the Advanced section, Tracking field, you will be able to assign Profiles, Goals, Campaigns, and Events to a preset.

Assigning Profile, Goals, Event, and Campaigns to a preset.
Without Presets, you can still preview your Pattern card or Profiling based Personalization. In this case, you need to visit at least 3 pages that contain profile cards. These can be any 3 pages with Profile Cards. After that you can manipulate the Profile Cards triggered in the Settings to trigger the right Profile Card, and view the Personalization Rule being triggered.
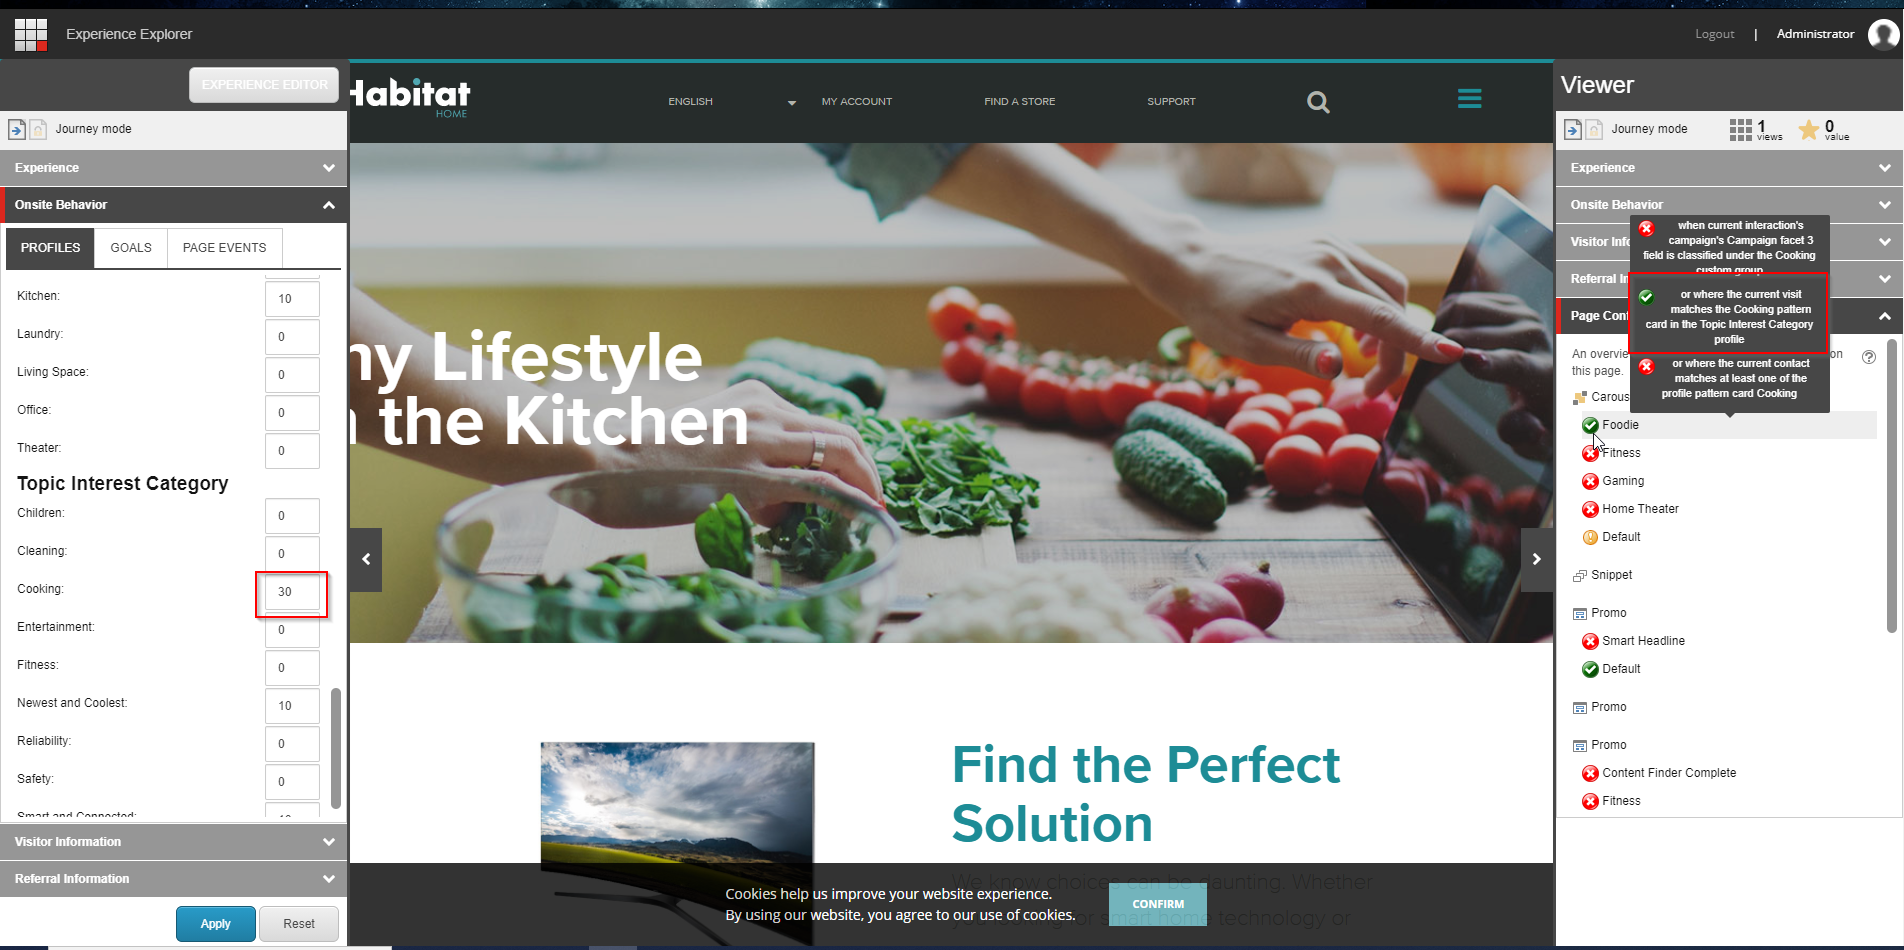
Adjusting profile key values
When to use:
Experience Explorer is perfect for testing Personalization rules. You can ensure that your personalization rules work, and view a personalized version of your pages. Experience Explorer is an extremely powerful and effective tool to preview personalization.
When not to use:
Experience Explorer has a few caveats in its previewing capability:
It requires the user to be logged in, in order to preview personalization
It won’t find every personalization related bug. Most importantly, because you are testing in CM, you still need to make sure not only your personalized page, but all the content and images associated with personalization are published.
Additionally, if your CM is a single server environment, and your CD is multi-server, you might still miss issues related to session storage or caching.
As such, ensure that basic personalization and analytics works in each environment before trying out personalization on your live site.
3) Preview via Screenshots
In Experience Editor, click on the Optimization tab and select Personalization.

Personalization Button
Select the appropriate Personalization Variant, and click on the image in the right bar. Right click and open the image in a separate tab.

Personalized Screenshot
You can now enhance/zoom into the image further to view your entire page with the Personalization variant.

Zoom into Personalized Screenshot
When to use:
This preview is best for sending quick preview links/images to your stakeholders (without Sitecore access) to view what the personalization will look like after go live.
When not to use:
The page in this preview looks only as good as it looks in Experience Editor. It’s important to ensure your page looks as expected in Experience Editor before using this Preview capability in Sitecore.
This Preview is only to view your page in the specific variant. It does not test the rules. In order to test Personalization Rules, see the “Preview via Experience Explorer” section above.
4) Preview in a multi-server CD environment with all appropriate caching turned on
When you have a live environment with multiple CD servers, it’s always a good idea to test your personalization in a like environment, especially if this is your first time trying out Personalization on your site, or if there have been significant code or environmental changes since the last time you tried out Personalization. This will involve setting up your personalization first in your test or staging environment before setting it up in production.
When to use:
The main use case for this setup is to ensure you have setup your environment in a way that is conducive to personalization. Here are some issues that may come up in a multi-server or CDN environment, that is not visible on the CM.
Session storage:
The symptoms: A user might see different versions of the personalized component or page based on the servers they hit (aka the experience is inconsistent every time you reload the page). However, you will only see this in a multi-server environment (aka on your live site, but not on your authoring or content management environment while you are previewing personalization).
The reason: You have the default InProc session state configured, and are not using sticky sessions. Read this community answer for resolution
Caching:
The symptoms: As soon as a user loads a version of the personalized component, whether the personalized or the default variant, all other users (including themselves) only see that version of the component for a period of time.
The reason: Your component probably has “Caching” selected. Even if you “Vary by data” it won’t change the caching of the component. If possible, and the performance of your page isn’t affected too much, turn off caching. Otherwise, use this “Vary by Personalization Data” option presented by Ahmed Okour.
Other possibility is that you have a CDN in the mix. If you are using a CDN, you want to make sure only the pages without personalization are hit by your CDN and those with personalization are missed. Nick Hills discusses this concept further in his whitepaper, Personalization at Scale.
When not to use:
You only have to test your personalization in a non-prod environment once and then after major code changes that affect session storage and caching. You don’t need to test every personalized component and rule in a non-prod environment before setup in production.
In Conclusion
This article has showcased 4 ways to preview your personalization before go live, with use cases for each:
Preview via Experience Editor: Use it always for any personalization or content change for that matter. Don’t publish your page before making sure it looks as you expect in Experience Editor.
Preview via Experience Explorer: Use it to test out your Personalization rules and preview your personalized pages, as different personas.
Preview via Screenshots: Use it to send images of your personalized pages to your stakeholders that may not have access to Sitecore, or don’t want to log in.
Preview in a non-prod multi-server environment: Use it the first time you are going live with Personalization or after any major code or architectural updates, especially involving Session Storage, Caching, or xDB.
To see the preview capabilities of Sitecore in action, watch my presentation at the SMAC Webinar
The goal is to remove analysis paralysis with personalization. Try out what is on your mind, and then preview and test to ensure it works as expected. Happy Personalizing!


